Friday, September 30, 2011

A rainbow of inspiration for you....

Friday favourites - a rainbow of colour

Looking at the above mosaic I think it's kinda obvious that I'm more often than not drawn to items with lots of colour which is probably why I like scrappy quilts more than anything although it's also a great excuse to play with lots of different fabrics ! :-)
This past week I have been inspired by the following items appearing in my reader:
  •  Designer pins by Patty Young @ Modkid boutique. She also has some pretty ribbon collections in her shop. Just saying...
  •  Laura Gunn's sneakity peek of her next fabric collection here.
  •  A new to me blog called 'nanaCompany'. Always inspiring with cute projects and pretty fabrics. (pretty fabrics get me every time!)
  • I'm very tempted to join up with Carina's Christmas stitches class since I was reminded by Susan that it's only 3 months till Christmas!! but not sure whether I have the time.
  • Also tempted to join this quilt along. One block a month sounds like my kind of pace:-)
So what's been inspiring you recently ??  


Monday, September 26, 2011

Spring blossoms and blooms...

Spring is really in full swing here and we have been watching this blossom tree just 2 doors along from us quite quickly come into bloom over this past week. Just when I thought it had finished coming out the next day it would look even more beautiful.

It is quite a large tree but I have no idea what sort of tree it is but a good one to play under for the neighbourhood kids when in the heat of summer it provides some welcome shade.

As you can see I took a few photos of it on Saturday which was a nice warm spring day, perfect for being outside in the garden.
These 'Clivia' flowers dotted around our backyard garden are providing a lovely splash of warm colour everywhere.
A delicate blue Japanese iris just coming into flower. These plants love the shade so last year I transplanted a whole bunch of these underneath the tall redwood trees at the back of our property.

Pink and red Azalea's flowering underneath our loaded Lemon tree.

A Magnolia bloom
One of our Magnolia trees with a very similar coloured Rhododendron in the background.
These tiny camera shy flowers were given to us from my late father-in-law and I think they are a native little orchid. Whatever they are I like them for their sweet size and colour.

What's flowering in your garden this season?

Friday, September 23, 2011

Introducing Carina!!

It is my great pleasure today to be featuring the multi-talented Carina here on my blog. I first came across Carina's blog when I participated in the Flowerpress Brooch swap way back in May.  Carina is originally from Denmark but is now based in the UK where she creates the most beautiful embroidery designs, vibrant and fun fabric designs on Spoonflower, and produces colourful crochet. She has also designed for DMC USA and blogs about her crafting life on Carina's Craft blog. There you will find lots of colourful inspiration, tutorials for embroidery stitches, crochet and more, plus some free patterns to get you started on embroidery. On top of all this creativity she also runs online creative blogger classes one of which I completed back in July. Carina has been blogging for about 8 years so has a wealth of experience to pass on to bloggers who are just starting out or feel like they need some extra help in making their blog more appealing to their readers. Read more about this class here! I thoroughly enjoyed it and can't recommended it enough!

Carina also creates and sells embroidery E-books and embroidery patterns in her shop Polka and Bloom!!
1. Spring Birds - new pattern, 2. Summer Garden pattern, 3. Sketchy stitches, 4. Sweet Posy - embroidery pattern, 5. Some stitcheries, 6. Christmas Stitches class - shisha ornament, 7. Satin bubbles brooch, 8. Orange stitchy brooch, 9. Stitchy brooch experiment
You can see more of Carina's latest embroidery designs here on the Polka and Bloom blog.

Some of Carina's vibrant Spoonflower designs...
1. My fabrics on Spoonflower, 2. Happy Flowers fabric, 3. Happy Triangles fabric, 4. Dots and Daisies collection
You can see more of her fabric designs on Spoonflower here.

Carina's designs for DMC in the USA

1. Pearl Cotton Display tea towels, 2. Winter Sunrise, 3. Blue Leaf Appliqué, 4. Doodle Heart

Some of Carina's colourful crochet projects....
1. Stack of happy crochet, 2. Another..., 3. Granny A Day blanket, 4. Crochet stack, 5. Crochet flowers, 6. Jars with crochet cosies, 7. Crochet bunting, 8. Granny A Day 1-20, 9. Folded

To get to know Carina a little better I asked her a few questions........
 
When did you start blogging and why? 
- I started blogging in 2003, completely on a whim. A few pals were doing it and I thought I'd give it a go too. Of course, blogging was very different back then - there was a lot of work involved just to make your blog look prettier etc. My first blog was mainly a personal journal and not really focused on anything. I started Carina's Craftblog in the spring of 2006 after I got into crafting.

How long have you been embroidering and who taught you or how were you taught?
- My farmor (paternal grandmother) taught me to do cross stitch when I was little, but there was a big gap between that and taking up embroidery in late 2005. So I am mostly self-taught, using books and the internet.

I can see your Danish influence in your embroidery designs, what keeps you inspired?
- I'm really, really inspired by colour. And texture and pattern. A tiny snippet of pattern can spark a new design. When I go actively looking for inspiration I tend to gravitate towards things like Ancient Roman frescos or Mexican and other folk art. Strangely, I don't often go searching for Danish inspiration as such.. maybe because it doesn't feel exotic enough..! ;-)

I love the name of your shop "Polka and Bloom". Can you tell us how you came up with this name?
- Thank you! :-) Well, way before Polka & Bloom actually existed, I made a couple of postcard designs, one was called 'Polka' because the background had polkadots, and the other one had flowers on it and I called it 'Bloom'. I just liked the two words together so I decided that if I were to set up shop at some point, I'd call it 'Polka & Bloom'. :-)

Do you have a designated workspace for your designing/crafting. 
- Unfortunately no. I'd love to have a space where I could make a mess and just close the door at the end of the day. For now, most of my crafting takes place sitting on the sofa, usually with a good film or documentary to keep me company.

Are there any other crafts that you like to dabble in?
- Uh yes! I'll have a go at pretty much anything that doesn't involve heavy machinery (and that's mainly because of the lack of space..!) ;-) When time permits, I'll do some crochet and sewing. Plus I draw and paint as well. Stamp carving, porcelain painting, fabric design, at one point I owned a Print Gocco but had to let it go because I just didn't use it enough.. etc etc...

Do you have any favourite embroidery tips you'd like to share with us?
- Patience is probably my best tip. When you start embroidering your stitches will be uneven, the French knot you did to perfection yesterday refuses to be replicated today. Don't worry about it, just keep on doing it. Oh and get some nice materials to work with; it really does make a difference to use threads from a good brand and not a six quid multi-pack.

What path led you to do the work you do today?
- Ugh, that's a good question but I'm not sure I have an answer that will make it seem obvious and easy that this is the path I would be on... But I've always been interested in creative things, like painting and drawing, but never really did much crafting. Until I moved to the UK. I  stumbled upon craft blogs plus I had some time to spare because initially I didn't have a job here. So I got into embroidery and the rest is history as they say.

Can you share with us any future ambitions/goals/projects you are working towards?
- I want to keep working on things that make me happy, and hopefully others too. In less lofty terms I want to make more embroidery books, 'proper' ones and ebooks. Plus more patterns and  teaching classes. I'd also love to devote some time to designing a proper fabric line.

When you're not crafting/designing/blogging what do you like to do?
- I might be reading a book or magazine, taking pictures or watching a film. Although.. even when I'm not doing any crafting/designing/blogging it's always kinda there anyway. Maybe I get inspiration for a design or a blog post; and the pictures I take often end up on my blog. If I'm watching telly I'm usually working on an embroidery or a crochet project. You can also crochet granny squares during the commercials before a film at the cinema - just sayin'! ;-)
If I'm really not doing anything, I'm probably wasting time on the internet!  

 I hope you enjoyed meeting Carina and take the time to look around her blog and shop
I would love to make these features a regular series here on The Sewing Attic so if you'd like to be featured or know of a blogger that you'd like featured let me know either in the comments or send me an email.

Wishing everyone a wonderful weekend!!   


Wednesday, September 21, 2011

Just flown in....

New additions to my stash
New additions to my stash arrived yesterday with my husband who is finally home from the US. Knowing that he'll bring back fabric for me always sweetens the deal when he goes away for a few weeks. This time he bought me a lovely fat quarter bundle of Kaffe Fassett prints and some more of Heather Bailey's 'Nicey Jane prints which are always welcome in my stash.

Kaffe Fassett fat quarters
Here's a better photo of those bright and bold Kaffe Fassett FQ's. Looking forward to playing with these babies!

WIP machine quilting
And this is what's happening in my attic this week. Yes it's taken me a while to get started on quilting this quilt but I've finally settled on a quilting plan. I found some pretty variegated thread to do some machine quilting  then I will do a little hand quilting as well having tracked down some Perle cotton in nearly all the right shades. I have 3 more quilts to quilt after this one and I'm determined to get them all done and dusted sooner rather than later. There I've said it publicly so now I have to!

Monday, September 19, 2011

Playing favourites...

Favourite strawberry fabric
Over the weekend I read a post on Mary's blog Molly Flanders   about her favourite all time fabrics. You know the ones that you hate to do without but know that one day they will go out of stock. Well I thought I would never be able to choose just one or two favourite fabrics because I have many and I keep adding to my list of favourites when new fabrics arrive in my stash. But then I remembered this strawberry print that I absolutely adore! I bought this print 'years' ago to make up into a twirly skirt for my now 14 year old daughter who I think was about 4 years at the time. So it's certainly no designer print that's for sure but I love it all the same. You can see I only have a scrap of it left now and also that the original skirt underneath is a little faded but it was a well worn skirt by both my girls and I can't bare to throw it away or pass it on to another family.

Favourite strawberry fabric
I have though used the scraps well by adding them to various blocks in Caitlin's quilt like this applique heart....
Scrappy hearts
.....and these scrappy hearts......
Scrappy flying geese block
and little bits in these scrappy flying geese. So even when I do run out I will still have some to remember, along with that faded twirly skirt.
So do you have a favourite fabric that you never tire of?? Please do share then go on over to Susan's blog Patchwork and Play and link up so we can all see your favourites!

Friday, September 16, 2011

Vintage embroidery

Vintage embroidery
This vase of pretty spring flowers is making me happy today not only because I love having fresh and fragrant flowers in vases around my home but also because it is sitting upon a piece of recently re-discovered vintage embroidered linen. 

Vintage embroidery
I have quite a collection of various pieces which I'd forgotten about. All have been completed by either my Grandmother, her sisters or my Great-Grandmother. We are not completely sure who has done which piece but I'm sure looking at the amount of work they put into each design they would be pleased to know that they are being once again, used, admired and looked after. 

Vintage embroidery
I love the style of writing on these particular pieces and also the pretty stitches used...french knots and stem stitch?

Vintage embroidery
This matching pair have what look like embroidered hollyhocks and a pretty crochet edging.

Vintage embroidery

Vintage embroidery
A variety of stitches have been used to create this pretty floral design.

Vintage embroidery
I love the pastel lazy daisy flowers on this one......

Vintage embroidery

......but this one is definitely my favourite. I love the very fine and delicate embroidery on it and it makes me inspired to do something similar myself.
I am just a novice at embroidery though but you have to have something to aspire too right?
Yesterday I read on Carina's blog ( who is a complete expert embroiderer!) about a contest happening over at "feeling stitchy". You have to design a book cover for a favourite book or any book for that matter using hand embroidery or freehand machine embroidery. Sounds like a fun challenge and I'm very tempted. Gone on over and check out the details  if you're keen too!
Have a happy weekend!!

Wednesday, September 14, 2011

My Blossom Bag...

My Amy Butler Blossom bag
I finished this bag today just in time to link up with Sara of Sew Sweetness for the "Amy Butler Sew along". We had to make a project using any Amy Butler pattern and I chose this 'Blossom bag' which is a free pattern available on Sew Mama Sew's blog. I think this bag is going to be the perfect spring accessory, not that it feels much like spring today...severe wind gusts making our house sway and nasty cold showers..Brrrrrrr

My Amy Butler Blossom bag
Inside this very roomy bag are two dividing pockets one with a handy zip making this bag very practical with a place for everything. Sara at Sew Sweetness has also made a nice version of this bag with some beautiful Echino fabrics and has also given a good review of this pattern. There is quite a few steps to making this bag but like all Amy's bags she has very good instructions.
I used 3 Amy Butler prints from her 'Daisy Chain' range plus a coordinating stripe by Jennifer Paganelli.

My Amy Butler Blossom bag
I particularly like the detailed way the handles are attached which gives it more of a professional look. I used the same stripe as the inside pockets for these details to make them stand out a bit.

My Amy Butler Blossom bag
There are two handle sizes. I chose the shoulder bag size because sometimes you need free hands when you go shopping :-) I think this bag just might be my new favourite.
Click on over to Sara's blog to see some more beautiful Amy Butler pattern creations or check out the Flickr page here.

Monday, September 12, 2011

New additions...

Every year my Mum and I have a girls day out at the Hamilton Quilt and Craft fair. It's a great day out looking and talking about things we both like, inspired by new products, seeing fabrics in person rather than online, and gazing at the beautiful featured craft displays. This years display from  'Creative fibres New Zealand ' really wowed us and left us in awe wondering how they create their hand woven and felted garments and art pieces. The quilt exhibitions also included some stunning work and again we were impressed with the details on the quilts and the beautiful machine quilting. Unfortunately I did not remember to take my camera with me so can share no photos with you. The only disappointment for me was that I only saw one quilt that included some hand quilting on it. I certainly know it is not a dying skill because I see many hand quilted quilts online but very rarely do I see them in local exhibitions.

While my budget didn't extend to buying yet more fabric I did add to my button and ribbon collection. And yes hidden under the buttons and ribbon is a copy of "The Farmers wife Sampler Quilt". I have been admiring the blocks being made in this Quilt along for a while now like Camille's here,  Kristyne's here and Jodi's here, but was on the fence about joining in since I hadn't seen the actual book. This particular copy was reduced from $45 down to $30 due to very minor dog-eared corners so how could I not resist :-). Now I just need to find some suitably pretty fabrics!

Saturday, September 10, 2011

The Sewing Attic - a little tour...

 I've just had a bit of a tidy up and re-arrange in my 'sewing attic' mainly due to finally putting my old sewing machine into semi-retirement and replacing it with my new to me Janome. I had come home early from a school Cross country trip with Caitlin and had an hour or so to spare and thought I would spend it wisely swapping my machines around but ending up having quite a tidy/clean-up. You know how once you get started tidying up one area it sort of leads on to another area and before you know it 2 hours has gone by. Anyway it also occurred to methat this would be a good time to take photo's to share on my blog. I always find it fascinating having a peek into the studios/creative spaces/sewing rooms of fellow crafters so I hope you enjoy this little tour!

Here is my new machine surrounded by my favourite things ie; favourite hand cream, pretty box of tissues (at the back), mini red drawers filled with machine needles etc.. Above and to the right-hand side is a wire recipe holder that my Grandmother made and which I now use for holding pattern instructions.
My sewing space is on the top floor of our home which is an 'A' frame house therefore making the top floor like an attic space with its sloping walls. The downside of it is that it is not as big as I would ultimately like and the lighting is not so great but I love having a space that's totally dedicated to what I love to do. Also when I'm sitting at my machine I can look over the railing and down into our lounge or out our big lounge windows. The view from these windows looks out over Whangamata and out to the ocean beyond plus I can be nosey and see who's driving up our street or my girls walking home from school. And because it's on the same floor as Caitlin's and what used to be Amelia's rooms I've never felt shut away from what the rest of the family is doing. I am also proud to say that my machine still sits on a sewing desk/table that I made years ago when I bought my first machine. It has 2 large cubby holes or shelves on each side that store books, magazines, scissors and all those things that need to be handy.
 Behind my sewing machine I have a set of wire shelves holding patterns and other various sewing/crafting needs. On an old trunk sits my wooden sewing box and a few baskets filled with my latest fabric purchases. Having some fabric especially newer fabric on display keeps me inspired :)
The bigger baskets hold larger pieces of different types of fabric and the red vintage vanity case has small scraps of girly fabrics that I can't quite throw away.
To the left of my sewing machine is a wooden box full spools of thread with an old fashioned styled lady pincushion sitting on top that my Mum made years ago. Under the cover is my Janome overlocker bought from my dressmaker neighbour. This part of my sewing table also serves as a small ironing/pressing space which is why I have an old towel on it.

 At the end of the sewing table is a collection of some of my quilts and items either finished and waiting for new owners or works in progress. At the moment that would be 3 quilt tops!
Underneath that happy pile of quilts and things is this lovely trunk that came (along with the other trunk in a previous photo) across from Ireland with my Great Grandparents. 
And ah yes this where I store the rest of my fabric stash. While it's not immediately accessible due to having to haul all those quilts and things off to get inside it, it is a nice safe way to store fabric.
And just around the corner on the other side of the trunk is this little display of cushions and Caitlin's Zig-zag quilt. And of course in that picnic basket is more fabric....my collection of Batik fabrics.
 So technically we are out of my sewing area now but I thought I'd share this photo of vintage suitcases. The bottom 2 were rescued from my parents garage and I can remember them being used on holidays when I was young along with that red vintage vanity case. The smaller blue one is an old school suitcase that I used at primary school and the top one was my kindergarten case which I think my brothers used before me.
This space is to the left of my sewing space and is a little mini library/reading area for the girls. It's a lovely place to sit and do some hand sewing or to just read of course because it gets the afternoon sun which is especially nice on a cool winters day. Out the window the view (beyond the neighbours house) looks towards the bush clad hills that surround our town. This space is also a favourite place for our feline friends to snooze in as well. The little red chairs used to be the girls when they were smaller but now make great cat beds. 

Congratulations if you made it to the end of this rather long post! 
I really hope you enjoyed seeing where I create! As I said at the beginning I love looking at other peoples creative spaces so if you would like to share your creative space on your blog let me know(in the comments) and perhaps I can compile a list here on my blog for us all to look at :)

Have a great weekend!!


Wednesday, September 7, 2011

Knitting roll tutorial

As promised yesterday here's a tutorial on how to make my knitting roll.
You will need:
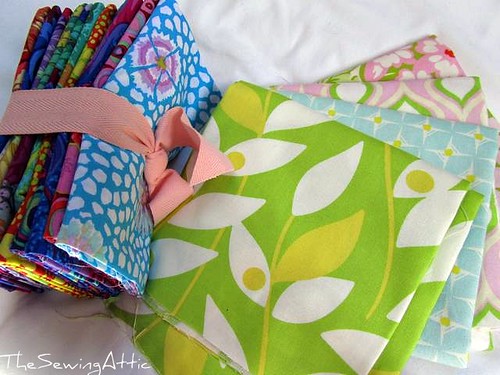
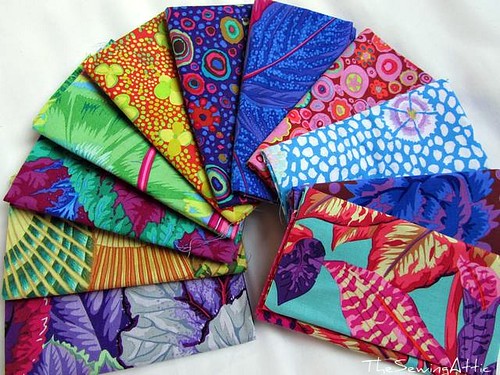
  • 4 coordinating fat quarters, one for the exterior, one for the interior, one for the pockets and one for the pocket linings.
  • 1 piece of fusible batting measuring 15 1/2 inches by 21 inches
  • 1/2 yard/metre of fusible interfacing for pockets.
  • 2 yards/metres of coordinating ribbon.
  • Matching thread  
Cutting instructions:
From the exterior and interior fabrics cut a piece from each measuring 15 1/2 " by 21". From the pocket and lining fabrics your will need a piece from each measuring 15 1/2" by 10" (large pocket) and another piece from each fabric measuring 11" by 12" (needle holder)
From the interfacing cut one piece 15 1/2" by 10" and one piece 11" by 12".
From the batting cut one piece measuring 15 1/2 by 21".

To make: 
Apply batting to exterior fabric and quilt as desired. In the above example I have quilted straight lines across the fabric approx. 1 1/2 " apart.
Apply interfacing to corresponding pocket pieces. With wrong sides together and with lining fabric on top sew lining to needle holder pocket piece up the lefthand long side pivoting at corner and along the shorter side ( which will be the top of pocket). Sew larger pocket piece to corresponding lining peice along one long side.

Trim corner off of the needle holder pocket and turn right sides facing out. Press. Turn larger pocket pieces also right side facing out and press.

Edge stitch 1/8" from edge along the sewn sides of both these pockets.

Place needle holder pocket on lower righthand corner of the interior fabric and sew down one side,along the bottom and up the other side.

Using a fabric marking pen measure across the pocket making a mark every inch. You should end up with 10 columns to hold 10 pairs of needles. 

Continue marking every 2 inches or so all the way down.
 Sew along these lines to make the individual needle compartments.
 
Lay the larger pocket on opposite side of  interior fabric and sew together along all 3 outer edges.
 
Measure and cut 2 lengths of ribbon approx. 36 inches. Fold in half and sew to outer edge of large pocket end as shown in above photo. I have me ribbons spaced about 2 1/2" from the centre of this edge so they are 5 inches apart.

With right sides together and keeping the ribbon pieces away from the edges sew around all edges leaving a 3 to 4 inch gap for turning on top edge above needle holder pocket. See above photo. I used a 1/4 inch seam for this step. 

Trim corners and turn so right sides are facing out. Press well also pressing in the gap opening edges. Pin these edges together and using a 1/4 inch seam edge stitch all the way around including along the gap opening edges.
And voila you now have a handy place for all those spare needles plus a pocket for your current project to take anywhere.


Roll it up and your good to go :)
Now of course if you don't have the time or inclination to make one yourself I have 3 for you to choose from in my shop.

Happy Sewing and knitting of course!


Related Posts Plugin for WordPress, Blogger...