Wednesday, October 24, 2012

Early to rise....


Thought I'd share this beautiful sunrise that greeted me as I walked (stumbled) into our lounge at 5.30am this morning. Seeing this made it worth getting up so very early. My eldest has a baby sitting job at some nearby neighbours 3 mornings a week and as she does not have an alarm on her clock it is up to me to get her up, which truth be told I actually don't mind too much since I usually go for a run at 6am anyway. I feel super organised getting up that early though. It was a beautiful clear, sunny day here today making it very hard for me to stay indoors although I did manage to get a little sewing and cutting out done on a couple of projects I'm working on. 

Thursday, October 18, 2012

The "Boho" bag

So this is the second bag I made with the same pattern I drafted for the bag in the previous post. I have a lovely collection of batik fabrics that I purchased a few years back on a holiday in Bali and because I don't go to Bali as often as I would like these fabrics are in the "precious category" of my stash but I thought they would be perfectly suited to this type of bag. I wanted a sort of bohemian look so pieced some small pieces of batik scraps together onto some light interfacing then embellished each seam with a variety of machine embroidery stitches. I added a flap to the top with a magnetic enclosure simply because I didn't have a zip in the correct colour or length.

A simply made soft 'button' was added to the flap front on top of the magnetic stud which I think goes nicely with these ethnic looking fabrics.

This is the back of the bag and also one of the side pockets which I made slightly bigger than the original pattern, added an inverted pleat to the bottom and elastic to the top which makes the pocket more secure and perfect for holding things like sunglasses or a cellphone.
The straps are done the same way although pieced together from 3 different prints.


The fabric used on the inside of the bag is an African fabric called "shwe shwe" and I think it coordinates nicely with the batiks. I did the same zippered inner pocket but also added a hooked clasp on some woven ribbon to one of the inside side seams for holding/securing keys.

And here is my beautiful model once again in our garden doing a great job of modelling this bag.

The boho bag is now available to purchase here in my Etsy shop.

A new bag for spring/summer

 I made this shoulder/ messenger bag about 3 weeks ago now but couldn't find time to blog about it so yeah 3 weeks later here it is. Its a type of bag that I've been wanting to make for a while now. The pretty floral fabric I used has been in my stash for a few years, actually I bought it before I had kids as I can remember the dress I made it up in. I don't have the dress any more but thankfully had quite a bit of the fabric leftover patiently waiting for the perfect project.

It is a lovely roomy bag with 2 outside pockets and 1 zippered inner pocket. The straps are generously lengthy and tie at the top so you can adjust their length to where you want the bag to sit. I like to have it strung across my body with it sitting nicely on my hip and leaving my hands free.

I originally strung some beads onto the zip but then found this little dragonfly charm that I had forgotten I had bought some time ago. I think it fits in perfectly with the floral almost botanical look of this print.


And here is my beautiful 15 year old modelling the bag for me in out garden last Sunday which was a warm but breezy spring day here.  Notice the tail of my ever present photography assistant.
I have since made another one of these bags with a few extra features but that is a whole other post :-)

Wednesday, October 17, 2012

Keeping busy....


So looks like I've had an unintentional break from blogging lately. I've been keeping busy with school holidays, doing a spring clean-up in my garden, quite a bit of sewing, and oh yeah I've just celebrated a birthday :-) My girls made me feel loved and special with presents, artwork, and thoughtful words written in my birthday cards. My parents took me out shopping and to lunch for the day and 2 girlfriends organised a casual dinner of home made burgers and wine. I whipped up the above Strawberry chocolate tart for dessert and it was the perfect decadent ending to a perfect birthday. You can find the recipe here. Be warned that the only thing healthy about it is the 2 punnets of strawberries underneath the white and dark drizzled chocolate layer. Although dark chocolate has some health benefits too right??

Okay I shall be back very soon with a post or 3 to share what I have been sewing.

Monday, October 1, 2012

What goes around comes around.......

I had the pleasure of working with some pretty fabrics from my stash last week to up-cycle this thrifted lamp for a very good friend and neighbour last week.  She has been a very supportive friend to me in these past months, and has the ability to make me smile and laugh when I need to and always comes out with the wisest of words to uplift my spirit. 

Re-cycled lamp
The lamp is for her daughters room who just happens to be a very good friend of my youngest daughter. For her birthday 2 years ago I made her this cushion so we used similar fabrics and colours for the shade.

Re-cycled lamp
The fabrics are mostly Heather Bailey because like me my friend has good taste in fabrics :-)

Re-cycled lamp Re-cycled lamp
She painted the base white which I think makes the pretty fabrics in the shade stand out well and don't you just love that beautiful mirror hanging above the drawers.

Monday, September 17, 2012

Crackerbox quilt finish!

I have been trying to get this quilt finished for the last week but have been lacking in focus and motivation lately. Finally this morning I put in the last hand-stitches into the back of  the binding whilst enjoying a spot in  the morning sun. Then while the sun was still hanging around I took it out into our garden for a photo shoot before the rain in the surrounding hills arrived. 

Crackerbox quilt 
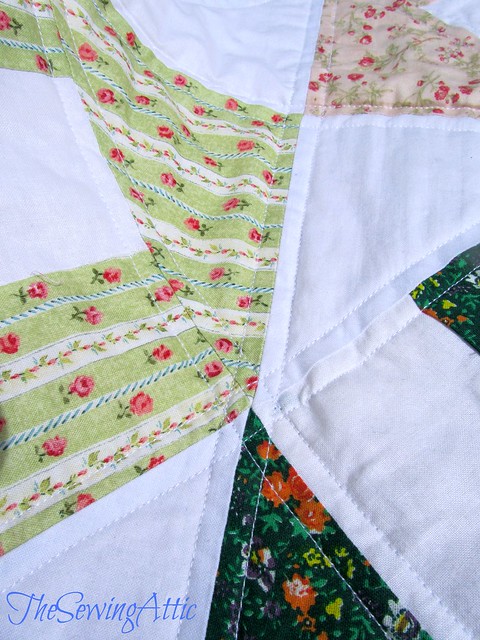
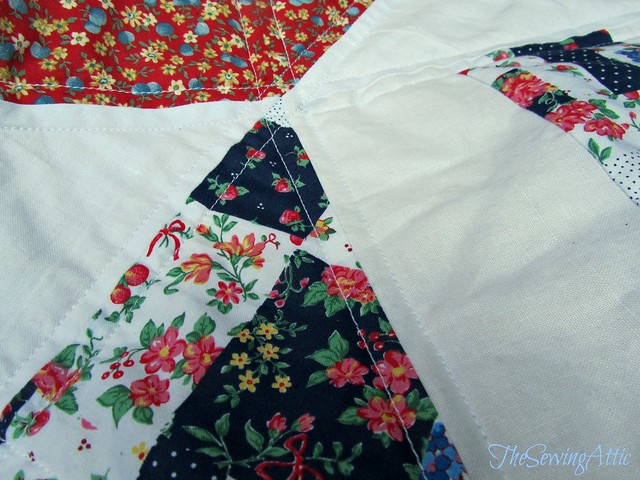
The pattern is called 'Crackerbox' and is quite simple to piece together as it's just made up of 1/2 square triangles (large ones) and fabric strips. I picked out some pretty floral fabrics for the top that have been hiding in my fabric stash just a bit too long :-) It feels good to finally have them in a quilt top at last. 

Crackerbox quilt 

Crackerbox quilt 
Some of the prints were bought back for me from Portugal when me eldest daughter was just a baby and one is a vintage fabric passed onto me from my Aunty who was a pretty good seamstress in her day.

Crackerbox quilt 
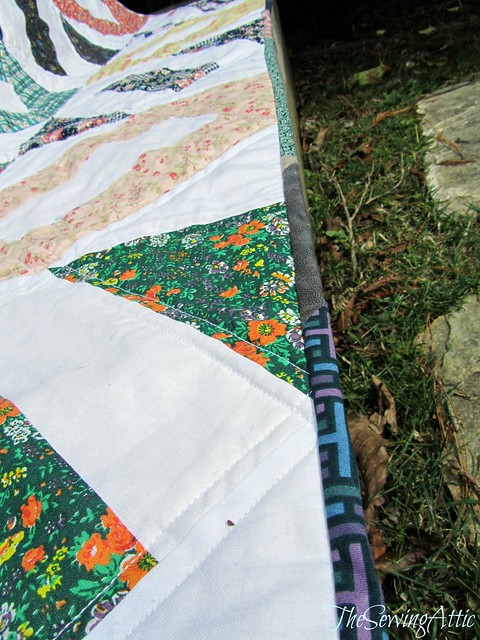
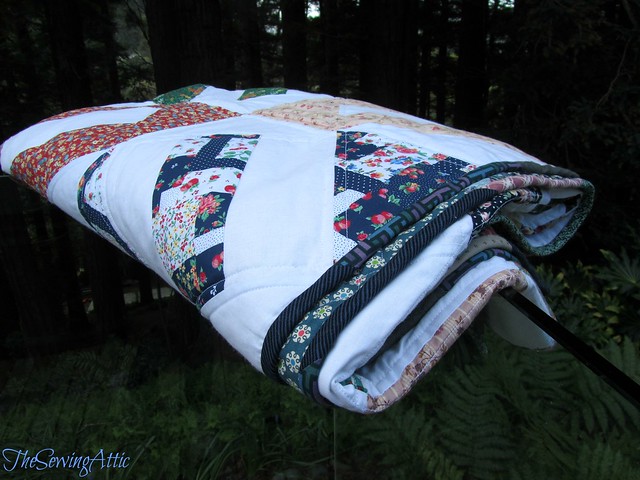
For the binding I used up yet more fabrics from my stash to make up a scrappy looking binding which I think suits the scrappy look of this quilt. It is simply quilted in straight lines following the seams of the pattern.

Crackerbox quilt - improv back 
And yes the back of course is made up of leftover fabrics from the front along with a "Denyse Schmidt" print purchased on sale at Spotlight. 

Crackerbox quilt 
It does feel good to have this quilt finished and to now be able to start a new sewing project or two.
So many ideas swimming around my head now but which one to focus on.........

My photography assistant
And here is my photography assistant that kept me company around the garden today. By that indignant look on her face I don't think she enjoys having the camera pointed her way though ;-)

This quilt will be added to my Etsy and Felt shops tomorrow :-)

Monday, September 3, 2012

Dining table reveal....

 I have spent a good part of the last couple of months sanding back my dining table ready for a fresh, new, slightly more modern look. I nearly forgot to take a before photo, but remembered part way through the sanding process. The main reason it took so long was the weather, which has been just a tad wet here lately. As I didn't want to sand inside I had to wait for fine days to drag it outside onto our deck to work on it plus it is too heavy to lift on my own so I had to have someone around to help out. It's a very heavy solid table!! I have had this table for over 20 years as it was purchased with our first home and the elderly owner was getting rid of everything and at that stage we had nothing.
 
 So here it is with a fresh coat of paint and clear polyurethane, looking much more fresh and modern don't you think :-) I know my parents will not like the pedestal painted white but I really love this look and had found inspiration for this look on Pinterest here and here. I like this look too but wasn't quite brave enough to do it :-)
I was originally going to go for a 'white wash' look but it just wasn't looking right with the dark mahogany wood underneath so I ended up with this solid white with a couple of coats of clear polyurethane to give it some sheen. I think painting it white has made it's lovely decorative features stand out.

 I had also thought about painting the whole thing white but once I sanded it back to reveal it's beautiful wood grain I just could not cover it up and decided to simply give it a coat or 3 of clear polyurethane.
I am now waiting for the rain to stop long enough to go outside to pick some pretty spring flowers to fill this collection of vases I put on the table this morning. Think I might have to retreat to my sewing attic for some sewing in the meantime though, it's looking pretty wild outside at the moment.

Related Posts Plugin for WordPress, Blogger...