Friday, January 29, 2010

Welcome to my guest blogger Amelia!!

I have finished my 2nd quilt! It is quite bigger than my first. My first one was a doll quilt made for my little sister which you can see here. The fabrics I used were old scraps from my Mum and they were just the right size. I had been wanting to make this for quite a while. We started on Monday and finished on Thursday.  It was kinda of hard at first  because I had to get used to using the machine which I hadn't used in a while. My Mum helped me with putting the fabrics in pairs and cutting up the strips for the back.
I especially love the aboriginal fabrics on the back. I am really into fabrics from different cultures.


I did the straight line quilting and Mum did the wavy lines along the borders.
I am going to add this to this weeks Sew'n'Tell Friday!!!! Don't forget to check out all the other finishes for this week over at Amy's by clicking on the butoon over there on the right.
Thanks for reading my first blog post!!!!!! Amelia:) [ameliaroxz:)]

Sunday, January 24, 2010

Continuous Bias Binding - Tutorial

I thought I would share my technique of making bias binding for my quilts. It is a really easy  method and it makes buying the exact quantity of fabric you need easy. I always tend to make more than I need as then I have some ready for small projects or for trimming skirts or dresses.

Firstly you need to measure the circumference of your quilt then multiply it by the width of the bias binding you want. I usually go for 2 1/2 inches width and use it doubled.
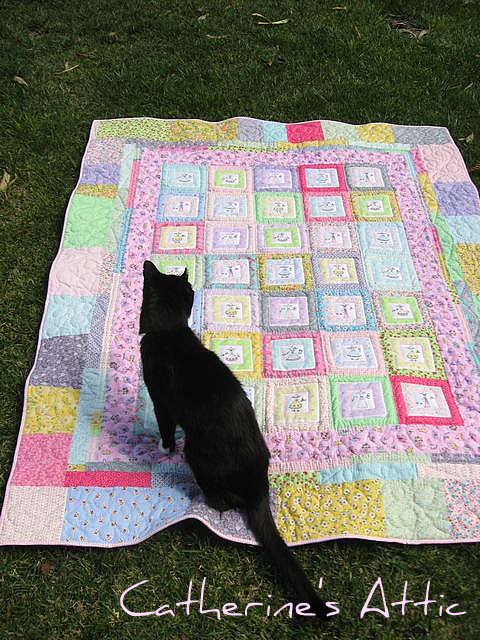
 So for the frock quilt  it was 50"x 2 by 62"x 2 = 224" circumference. Then multiply this with the width of your binding ( 224 x 2 1/2 = 560). Then using a calculator find the square root of 560"and you should get 23.66. Round this up to 24" and this is the size of the square of fabric you will need to make binding for your quilt.

Using a rotary cutter cut the square from corner to corner making 2 triangles.


Place triangles right sides together as shown in above photo and sew 1/4" seam and press open.


Using a quilters ruler and fabric pen mark lines of 2 1/2" apart starting along the longest edge on wrong side of fabric as shown above.


Now this is the tricky bit to explain. Bring together the shorter sides and line up your marked lines leaving one strip out from the edge at each end as shown above.

Now pin right sdes together lining up your marked lines as you pin so the pin intersects the lines 1/4" in. Sew a 1/4 " seam and press open. You will now have a joined 'tube' of fabric

Starting with the strip that wasn't included in the last seam, cut along the marked lines. You will be cutting in a spiral around the tube.


Just keep on cutting until you reach the end. Now all you have to do is press in half and your bias binding is all ready to attach to your quilt.


Using a 1/4 seam, sew binding to quilt stopping 1/4" in from the end.


Turn quilt and fold binding back as shown above.


Then fold back as shown above and line up edges. Repeat for remaining corners. This will leave a nice mitred corner once its folded back over.


Fold over to back of quilt and stitch in place using a ladder stitch.

I hope you found this tutorial helpful and easy to follow. If you have any questions please don't hesitate to contact me via the comments or email.

Friday, January 22, 2010

The frock quilt is finished!


I completed hand quilting this quilt last night while watching "The Green Mile". I can't believe I haven't seen this movie before. It's now on my top 5 movie list. It made me laugh and cry and was just such a powerful movie. If you haven't seen it you must! Anyway I'm so pleased to have finished this quilt and really love how it's turned out. I took it out into the garden for a photo shoot and our oldest and grumpiest cat decided as cats do that it would be nice to sit on. Just as well he had clean paws!
I made and attached the binding this afternoon. It took me over 2 hours to hand sew it down. It is usually a job I like to leave to do in front of the TV at night but I was keen to get it finished and photographed, plus we went out to a barbecue for dinner tonight. I have photographed each step of how I make my binding so I can do a little tutorial on it tomorrow.

For the backing I used up some of the leftover strips for a line of blocks down the centre for added interest and to make the backing fabric to go further.


And one last photo that gives a better look at the quilting. It is 90% hand quilted. I machine quilted around the inner individual blocks and handquilted all the borders with various meandering loops and hearts. This quilt now belongs to my eldest daughter Amelia who loves clothes and shopping.
This is my finish this week for Sew'n'tell Friday. You can check out some more finishes over here or click on the button on the right hand side bar.

Monday, January 18, 2010

Swimming with frogs!


Sorry for the lack of blogging but the girls and I went away for a few days to stay with friends who own a few acres just outside of Hamilton. While I helped out in their rather large garden the girls played with my friends 5 month old nephew while his Mother was able to do some work on her laptop, played Wii sport, and swam in their pool.  

The highlight of Caitlin's stay was when we found a couple of frogs in the garden. Caitlin loves animals small and large so she was in her element. Our Friends let her take it in their pool for a while (salt water pool) and she had a great time swimming around with it while I took photo after photo trying to get that elusive perfect shot.


We were only back home for 2 days before we were off again down to Palmerston North (approx 6 hours drive away) for a wedding, dropping the girls off at my parents in Waihi on the way through. It was a lovely wedding with the rain holding off at just the right times. It was really nice to go away for the weekend just as a couple. On the way home we took our time meeting up with friends for brunch and exploring some antique and 2nd hand stores in a couple of the small towns that we usually just drive straight through. In one antique shop I spied a vintage wooden cotton reel holder that was like a cake stand with 3 levels. (I'm now kicking myself for not taking a photo of it!) It was beautiful and came complete with vintage cotton reels. And yes it stayed in the shop because its price tag was $450!!

These fabrics were waiting for me when I got home from our friends. About a month before Christmas I entered a giveaway on the blog of fabric designer 'Valori Wells' . I then completely forgot about it as I never thought I had a chance of winning. I recieved 7 fat quarters of her designs on flannel. They are lovely and soft and I just love those cute little owls!

Friday, January 8, 2010

Christmas gifts.


This is the dress I made Amelia for her to wear on Christmas day. It is a free downloadable pattern on Heather Ross's blog. I really enjoyed sewing this dress and I'm now hooked on making clothing with shirred elastic. I have allsorts of ideas floating around in my head and wish I had mastered this easy technique when the girls were smaller. For added interest I added a belt which ties around her waist twice.


There is plenty of room for growth plus I have added extra to the straps so I can let it out as she grows.

I made 2 aprons for my Mum for Christmas. This is the "Cup half full apron" from Anna Maria Horner's book "Seams to me". The beautiful floral fabric is by 'Donna Wilder' for Fabric Traditions, found at Spotlight.

This is the "Full contact cooking apron" also from the book "Seams to me". There's a lot more sewing in this apron but totally worth it. It took most of the day from cutting out to sewing on the buttons on. The fabrics are again from Spotlight which is impressing me lately with the fabrics they are now stocking.
I'm linking up with Amy's Sew'n'tell this week which has re-started after the Christmas break. Go on over and check out all the other Friday Sew'n'tell's too or link up if you have some finishes to share.

Thursday, January 7, 2010

Some goodies in the mail.....


A couple of weeks before Christmas I was lucky enough to win this gorgeous Jelly roll from the lovely Marguerite on her blog "Adventures in quilting and sailing". She was celebrating her 100th post and asked us to post about where we live which I did here. I've never bought a jelly roll before as they are quite expensive here in New Zealand so I was pretty excited to win one. Its "Shangri la " by Seven Sisters. Its very pretty in muted greens, pale blues and reddish pinks and very me.

Marguerite also sent a lovely Christmas parcel containing some adorable dutch fabric, Christmas ribbons and stickers and a beautifully embroidered felt heart decoration which will not be put away till next Christmas but is going on display now in my sewing attic. Oh and those chocolate bells are gone already! Yum!
Thank you so much Marguerite!!!

Tuesday, January 5, 2010

Making flowers...........


I spent a couple of hours yesterday making some "origami fabric flowers". I first saw these flowers on Sandy's blog Peek-a-boo. She then generously shared a very easy to follow tutorial for them a couple of months ago.

This is one of my sewing boxes which I made quite a few years ago. It originaly had a folded ribbon flower on it's lid that had begun to unravel. Now it looks pretty again with its brand new flower on top of the lid.

This flower adorns my latest bag and was made using 1" squares. I thought it would be quite fiddly to make but it went together as quickly and as easily as the bigger one.

I made this bag over the weekend from a pattern I found on Artsy-craftsy babe's blog. She has a few free tutorials and this bag is one of them. Its called the "Phoebe bag" and I downloaded it and printed it out quite a while ago then forgot I had it till I gave my sewing space a clean out. I found quite a few patterns I have printed out and still want to make, so watch this space.

I used Heather Bailey's "Swirlybuds" in fuchsia for the outside of the bag, the striped lining and pink and white polka dot used for the pocket are from Spotlight. I used a magnet closure for the first time too which was again pretty easy although I did have to ask my husband to help push the metal tabs down.
So there you go 2 great tutorials that I can thoroughly recommend.

Monday, January 4, 2010

Having a Staycation..........

We've been making the most of the beautiful sunny summer weather, and enjoying some quality family time around Whangamata. Last Sunday we went for a 3 hour walk up "Parakawhai" one of the valleys just south of our town.

The walk takes you along a stream and through old gold mining tracks and of course beautiful New Zealand native bush. This is one of the waterfalls that you are rewarded with at the top of the track. There are 2 other waterfalls flowing from pool to pool.


This swing bridge has recently been completed and crosses over the larger waterfalls. You can see my husband holding on to the sides of the bridge as Caitlin had decided to jump up and down just to make the bridge swing..... as you do when you're 10 years old!


We stopped on the other side of the bridge for a picnic lunch, sitting on quite a large rock that we thought was safe until we looked back to where it was and saw that it was jutting out from the pathway and most of it was over hanging above the stream below.

 
At the beginning of the track there are numerous waterholes to swim in and some are deep enough to dive into. We promised the girls we will come back soon just to go for a swim. We forget that these activities are right on our doorstep and it was good to remind ourselves how lucky we are living here with so many outdoor activities to enjoy.
Related Posts Plugin for WordPress, Blogger...