Showing posts with label wreaths. Show all posts

Thursday, August 18, 2011

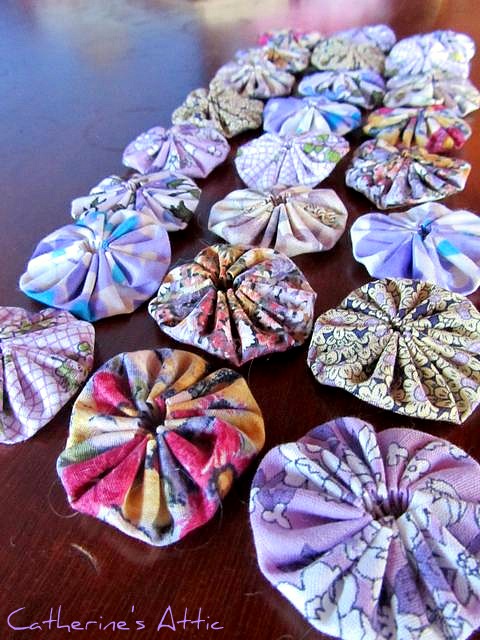
Yo-yo's and yet more yo-yo's

Making yo-yo's
I've finally started making some yo-yo's for Penny's 'Yo-yo along'. After finishing up my crochet blanket I needed something to keep my fingers busy at night in front of the TV as I just hate to sit and do nothing so making these yo-yo's is the perfect activity that keeps me busy but still lets me watch my favourite programmes. I've decided to do one colour group at a time so it doesn't seem such a daunting task although having a yo-yo maker certainly makes it quicker and easier. I'm up to 24 as of last night. Penny's making 1008!

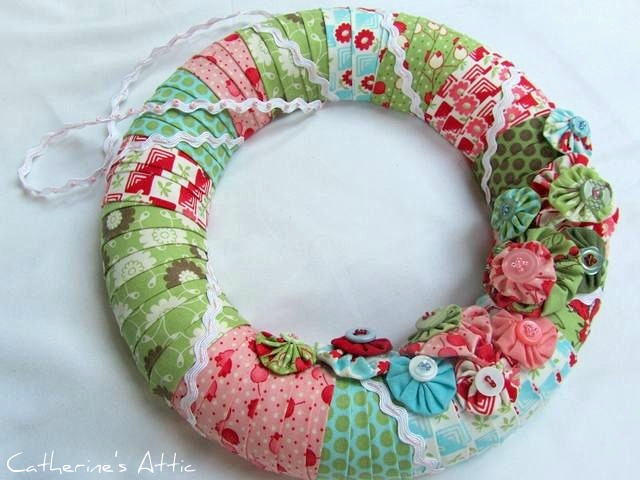
Bliss yo-yo wreath
And in keeping with the yo-yo theme this is a wreath I made with some of my leftover Bliss fabrics and a few yo-yo's. What do you think?

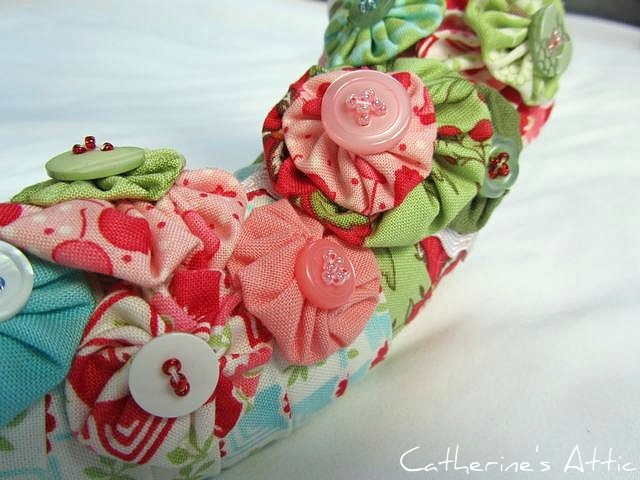
Bliss yo-yo wreath
I really enjoy adding little details to my projects so I embellished the yo-yo's with a selection of buttons and sewed them on with some sparkly beads.
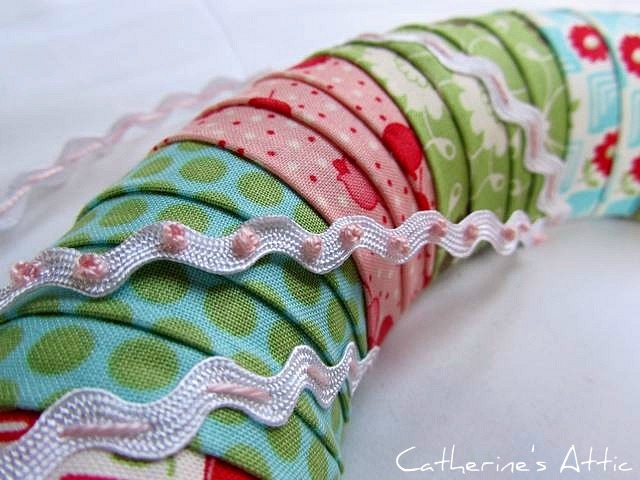
Bliss yo-yo wreath
I also wrapped some white ric-rac around the wreath and did a simple running stitch with some pale pink perle cotton to keep it in place and a ric-rac loop for hanging embellished with some simple french knots. Pretty don't you think and its for sale in my shop here.

Monday, July 4, 2011

Downsizing....

Yes finally I'm on the smallest sized square, which means I'm on the home stretch to finishing my first crochet blanket which just happens to be my first ever crochet project. I guess I like to challenge myself when it come to trying new skills. It's been a year since I started this crochet project and although I've had a few mini breaks I have enjoyed every minute of making these squares and can't recommend it enough as a great take anywhere portable project.

And this pretty wreath is something else I've been working on these last few days. I managed to add the last few finishing touches to it today.You might remember I showed a sneek peek of it on Friday. When I started designing my Bliss quilt I wanted to also design some coordinating bedroom decor items with a similar theme as well as the same fabrics and this is one of the ideas I came up with. I'm really loving how it turned out.

For the hanging ribbon I just hand stitched some white ric-rac to some narrow red ribbon with some perle cotton. As I've mentioned before I just love adding ric-rac to items.

The pinwheels are 3 inches across and are topped with some pretty buttons. Buttons are another favourite addition that I like to use.

Another photo to share because the weather gods were smiling today and I got some great shots making it hard to choose the best ones.

Listed in my shop today here :)

Monday, May 16, 2011

Fit for a princess!

This post has been a long time coming but finally I can share some photos of  my daughter Amelia's newly decorated room. Her old room was upstairs on the top floor of our house but we decided to redecorate what  used to be our spare room and move her in there which pleased her greatly. We painted the window frames white and Amelia chose the turquoise blue wallpaper, the charcoal curtains. and the new light fittings herself. I'm really pleased with how this room turned out. It is nice and bright and perfectly stylish for a nearly 14 year old girl and she now has way more storage space than she used to.  

 She has a wardrobe with shelving which she never had in her old room and a door to slam shut if she feels the need :) In her old room she just had curtains across the entrance.

The dressing table used to be mine when I was her age and hanging next to it is the wall hanging I made her to match this quilt.

A garland of hearts made in a crazy patchwork style with scraps from the frock quilt.

She now has room and a place to display all those essential girl things.

Her cushions I made her here and here are now nicely displayed on her bed.

Above her bed is a new light fitting and her dream catcher plus you can see the pretty swirls at the ends of the new curtain rails which match the swirls in the curtains.

The wreath I made her here also hangs above her bed.

Some favourite things on her bedside table.

Her new desk with a pink Swiss ball as her chair and the memo board I made for her last Christmas. The turquoise blue in the Heather Bailey fabric used on the memo board was the inspiration for the bedrooms wall colour.
And finally this little bird house and bird has been hers since she was about 2 and now hangs above her desk. Moving into her new room also meant being able to have a good clean out and deciding what she did and didn't want to keep. A lot of stuff was thrown out or passed onto her sister but I'm so glad she wanted to keep this birdhouse which was the starting point to decorating her first room with a garden theme.
I hope you enjoyed seeing Amelia's newly decorated room. I'm still working away on my Bliss quilt top but hoping to finish it within the next 2 days!
Happy Monday!

Thursday, December 16, 2010

Handmade Christmas - a fabric wreath

We had a rather cool and very wet day today as you can see from the rain on the windows in these photos. As they say "good for the garden" and I say good for some creativity in my sewing attic!
Everything I used to make this wreath is what I had on hand. I love it when I can make something entirely from my stash! Leftover scraps of  batting wrapped around the cane base, then leftover ends of bias binding were used to cover the batting. A couple of yoyos and a fabric flower leftover from previous projects.

The big red flower is one created by my clever Mother and was the perfect match for the colours on the wreath base. I have quite a few of these lovely knitted flowers just waiting for the right project to be matched with. Thanks Mum!

I added more yoyo's made from scraps and finished with various buttons from my button stash. The little Christmas tree is a ceramic button that I got a few years ago and thought I would never use. And for a little sparkle I added a few beads when I sewed on the buttons
So there you go another inexpensive and easy Christmas decoration and something bright and cheery to lift a dull rainy day.

Wednesday, December 15, 2010

A handmade Christmas - the button wreath

Here's another quick and simple decoration idea and inexpensive too if you are like me and collect buttons old and new.
All you need is some wire strong enough to take the weight of the buttons but bendable so you can make a nice round shape, a selection of buttons of varying sizes, ribbon , and a few bells for a nice Christmasy jingle.
  1. Simply cut your wire to desired length (which will depend on how big you want your wreath and how many buttons you have)
  2. Thread on your buttons then twist wire ends together to secure.
  3. Add a ribbon loop for hanging and tie ends in a bow.
  4. Thread bells onto ribbon and tie with a bow onto wreath letting them hang in the middle.
That's it! A simple button wreath. If you feel inspired to make one I'd love to know.
Related Posts Plugin for WordPress, Blogger...