Showing posts with label Recipes. Show all posts

Saturday, September 12, 2015

Little bliss balls....


 I've been making these little balls of sweet goodness for a few weeks now. They are the perfect sweet treat for those moments when you crave something sweet but know you shouldn't. They look and taste like they are too good to be healthy but contain no sugar or fat.

They are naturally sweetened with a mixture of dried fruit such as dates, sultanas, prunes and figs or whatever you have on hand along with cocoa, nuts and peanut butter. This latest batch contains dried cranberries rather than sultanas and figs because I like the crunchy texture of the fig seeds. You could coat them in coconut, cocoa, finely chopped nuts or toasted sesame seeds too or make them even healthier by adding chai seeds or flaxseeds. 
Here's the basic recipe which I always double as 10 balls is not enough ;-) ....
Ingredients:-
  1. 1 tablespoon peanut butter (crunchy or smooth)
  2. 1/2 cup dates, soaked in boiling water then chopped finely
  3. 2 tablespoons cocoa powder
  4. 1/2 cup dried sultanas
  5. 1/3 cup dried prunes, soaked in boiling water then chopped finely
  6. 1/2 cup unsalted peanuts finely chopped
Method:-
  1. Place all ingredients in a food processor and mix well to form a tight mixture.
  2. Use wet hands to mould 10 balls, squeezing mixture tightly so it sticks together.
  3. Place in refrigerator to chill for 2 hours or overnight. Store chilled in a sealed container for up to 10 days, if they last that long....
Enjoy!!

Tuesday, December 23, 2014

A little like Christmas....


 Our tree is up and decorated with some favourite decorations along with some handmade wreaths around the house. Our little street is looking like a disco with a few of the houses going slightly overboard with outdoor Christmas lights bringing a steady stream of cars crawling up our street.

 Somehow even though we are surrounded by festive Christmas lights and our house is suitably decorated we are somehow not feeling very festive this year. My eldest daughter Amelia commented that I hadn't done any Christmas baking like I normally do each year. So in an effort to make at least my daughters feel a little more festive, yesterday afternoon we decided to make some chocolate peppermint bark. It's an easy recipe to make just a bit of waiting time for each layer to set before adding the next. We started melting chocolate then realised we didn't have any candy canes. A quick trip to the supermarket revealed that they were all sold out so we decided to improvise and make do with what we did have and we came up with triple chocolate peppermint and pistachio bark.

 Not much of a recipe to share but here it is:
  1. Melt 200 gms white chocolate with 1/2 tsp peppermint essence and 20 gms kremelta (vegetable shortening) and spread onto base of a lined sponge roll tin. Place in freezer to set.
  2. Melt 200 gms milk chocolate with 1/2 tsp peppermint essence and 20 gms kremelta and spread onto set white chocolate layer then sprinkle with chopped pistachios. Place in freezer to set.
  3. Melt 100 gms dark chocolate with 1/4 tsp peppermint and 10 gms of kremelta and spread over second layer. Melt 100 gms white chocolate with 1/4 tsp peppermint essence and 10 gms of kremelta and place on dark chocolate then using a skewer marble the two layers together. Finally sprinkle with more chopped pistachios.

Another recipe I usually make each Christmas are these fresh ginger biscuits which I made this afternoon using a variety of Christmas themed cookie cutters. This recipe makes a lot so they are good for giving away ;-)
  • 375g softened butter
  • 1 3/4 cups brown sugar
  • 1 egg
  • 1 1/2 tbsp grated fresh ginger
  • grated rind of 2 lemons or oranges
  • 3 3/4 cups flour
  • 2 tblsp ground ginger
  • 1 tbsp cinnamon
  • 1 1/4 tsp baking powder
  • 1/2 tsp ground white pepper
  • 1/4 ground cloves
  1. Beat butter and sugar together until light and creamy. Beat in the egg, grated rind and fresh ginger.
  2. Sift together all dry ingredients and stir into creamed mixture until well combined.
  3. Roll out the dough to 0.5mm thick and cut out shapes using various cookie cutters.
  4. Bake at 180C for 10-12 mins. Cool before storing in an airtight tin.


Thursday, May 8, 2014

Maple walnut banana muffins


Ummm yes I do have a surplus of bananas at the moment due to them being on special this week. When they get too ripe I will freeze some for baking and making smoothies later. Frozen bananas make the best smoothies :-)
Tonight I whipped up these golden muffins as I already had the oven on to cook a quiche for our dinner. This also means I have a ready made semi-healthy option for desert and something quick to put in the girls lunch-boxes tomorrow. 

Maple walnut banana muffins.

  • 2 1/2 cups of self raising flour
  • 1/2 tsp baking soda
  • 1/2 cup rolled oats
  • 1/2 cup soft brown sugar
  • 1/2 cup maple syrup
  • 2 eggs
  • 2 small overripe bananas mashed
  • 1/3 cup vegetable oil
  • 3/4 cup vanilla yoghurt
  • 70 gm walnut pieces
Preheat oven to 180C . Sift flour and baking soda into a bowl, stir in oats and brown sugar. Beat together eggs, maple syrup, oil and yoghurt then gently fold into the dry ingredients together with the mashed bananas until mixture is just combined. Do not over mix unless you want your muffins to have little mountains in the middle of them :-)
Spoon the muffin mixture into muffin tins lined with muffin paper-cases.( I always use muffin paper-cases as it makes cleaning the muffin pan much easier)  Bake for 15-20 minutes or until cooked and golden.  Enjoy!

Wednesday, February 5, 2014

Mid-week dinner...

 I spent the day in Auckland today getting through a list of things to do and buy then came home to whip up this yummy summer meal of Courgette fritters stacked with bacon and topped with avocado, plain Greek yoghurt and tomato salsa. This meal is always a hit with my girls who would normally turn their noses up at eating courgettes ;-)
 It looks impressive too but is simple to make and put together which is exactly what I needed after a day driving around Auckland not to mention the 2 hour journey there and back. Actually I don't mind the driving there and back as it's a good opportunity to listen to a podcast and some of my favourite music.
So if your interested in a quick summer meal full of fresh flavours not to mention that it's a good way to use up any abundance of courgettes from the garden, here's my recipe .......

  • 3 medium sized courgettes
  • 2 eggs
  • 1 cup self-raising flour
  • 1/2 cup milk
  • 2 tsp grated fresh ginger
  • 1/2 tsp ground cumin
  • 1/2 tsp ground coriander
  • 2 tblsp chopped fresh herbs ( coriander or chives or both are good )
  • salt & pepper
Grate courgettes then put all ingredients in food processor and process until well mixed. Heat oil in a heavy based frypan and pour in about a tablespoon of batter for each fritter. Turn when fritters begin to form bubbles and keep warm while cooking the remaining mixture.

To serve : Arrange lettuce (any variety) then chopped tomato and cucumber on plates. Layer fritters with slices of bacon then top with slices of avocado, Greek yoghurt or sour cream, tomato salsa and any fresh herbs. Enjoy!

Tuesday, November 12, 2013

Exam time.....

Stress levels are starting to creep up in our house as my oldest daughter, Amelia, prepares for her Level 2 NCEA exams. Yesterday on one of her breaks away from studying she prepared this yummy green smoothie to go with our lunch. With that vibrant green colour it has to be good for you! The 'green' layer is made up of spinach (from our garden of course :-) , green apple, lemon juice, and coconut milk, the white layer is more coconut milk, yoghurt, more green apple and mint. The recipe can be found here on "A beautiful mess"


Right at this moment Amelia is sitting her English exam and I can't help but think about her and hope the words are flowing onto the paper for her. To keep my mind occupied I have been spray painting her cane bedside table white as a wee surprise when she gets home. Hope she likes it :-)


Friday, May 3, 2013

A perfect Friday.....


So I've had another busy week plus it's been a bit of an emotional roller-coaster with some personal stuff I've been processing but today was the perfect ending. Spending time with good friends makes everything feel much better and of course getting out and exercising in the forestry surrounding our town is the perfect tonic when you're feeling a bit down about things. After a couple of hours of somewhat leisurely biking and chatting we headed back into town and home to shower then we gathered again for some more girls talk over tea and cake at my place.

For some reason I felt like baking late yesterday afternoon and was also in the mood to try out a couple of new recipes that I had come across recently. The above loaf is a coconut loaf with pink raspberry icing. Perfect for a girls afternoon tea not that I had that planned at the time of making it :-) Here's a quick run-down of the recipe because it is too delicious not to share.....
  • 125g butter
  • 1 cup sugar
  • 2 eggs
  • 1/2 teaspoon coconut essence
  • 3/4 cup coconut cream
  • 1 1/2 cups self-raising flour 
  • 3/4 cup desiccated coconut
Preheat oven to 175C. Line loaf tin with baking paper.
Beat butter and sugar until pale and creamy. Beat in eggs, one at a time. Add coconut essence and coconut cream and beat to incorporate. Stir in flour and coconut. Spoon into prepared loaf tin and bake for 45 minutes or until a skewer inserted comes out clean. Remove to a wire rack to cool. Once cold, drizzle with pink, raspberry flavoured icing made with 2 cups of icing sugar, a drop or 2 of red food colouring and 1/2 teaspoon of raspberry essence, 20g melted butter and 2 tablespoons of boiling water. Slice to serve. Enjoy!!


The second item I made was these maple walnut bars which are divine ! You can find the recipe here on Susan's blog Hanging on by Needle and thread. Susan often shares her delicious recipes :-)  and this one certainly is a keeper.
Today has reminded me how thankful I am to have such caring and supportive friends and to live in a town with so much to do right on our doorstep.

Wednesday, October 17, 2012

Keeping busy....


So looks like I've had an unintentional break from blogging lately. I've been keeping busy with school holidays, doing a spring clean-up in my garden, quite a bit of sewing, and oh yeah I've just celebrated a birthday :-) My girls made me feel loved and special with presents, artwork, and thoughtful words written in my birthday cards. My parents took me out shopping and to lunch for the day and 2 girlfriends organised a casual dinner of home made burgers and wine. I whipped up the above Strawberry chocolate tart for dessert and it was the perfect decadent ending to a perfect birthday. You can find the recipe here. Be warned that the only thing healthy about it is the 2 punnets of strawberries underneath the white and dark drizzled chocolate layer. Although dark chocolate has some health benefits too right??

Okay I shall be back very soon with a post or 3 to share what I have been sewing.

Tuesday, August 21, 2012

I am.......

Using up some fabrics from my stash and enjoying some improv piecing to make up the backing of......

 ......this quilt and then onto basting and quilting.
Maybe getting a little obsessed with eggs around here :-) We are now getting 2 per day and it feels good to have a dozen eggs in my fridge that are all from our hens. We have spoilt but happy hens I think.....
 Yes I even mark on the calender how many we get each day ...
....feeling very 'Martha Stewart' lately with these homemade preserves of Apple butter. So yummy on warm toast. This batch is quite spicy hence it's dark colour.
....And continuing with the 'Martha Stewart' theme we are also enjoying some Lemon Honey made with lemons from our laden lemon tree. It's especially nice swirled into plain yoghurt and served alone or on top of cereal.

Will be back soon with some quilt progress to share so I best get back to pinning those quilt layers together  so I actually have something to share sooner rather than later.

Monday, August 6, 2012

Wet weekending.....

 For the 3rd weekend in a row we have had constant rain which has kept us inside keeping dry and warm. I don't really mind the wet weather apart from the challenge of getting any laundry dried. The above blocks are based on an old pattern called "Cracker box" and are easy and quick to put together. All the fabrics are from my stash that have been patiently waiting for probably too long for the 'perfect project' to put them in. I have them teamed with a solid white to make these pretty prints stand out. Hoping to put them together tomorrow since there is more rain forecast for the rest of the week ....
 I tried a couple of new recipes that I have pinned on to my Pinterest board "Devour" to fill our tins for the coming week. Above is a very moreish white chocolate blondie  topped with cinnamon sugar, which I don't think will last the week ;-)
And these are White chocolate and gingerbread biscuits. I used this recipe here but rolled them in sugar before baking and pressed in the white chocolate buttons while they were hot out of the oven as in this recipe. These are a new favourite in our house now.


Thursday, March 29, 2012

A recipe to share....

Because a couple of people asked here's the  Marshmallow shortcake recipe for you to try out for yourself.
This recipe comes from the well known (in New Zealand) and used "Edmonds cookbook" and  is easy and fun to make.

For the shortcake:

  • 125g (4oz) butter
  • 125g (4oz) sugar
  • 1/2 teaspoon vanilla essence
  • 1 egg
  • 225 (8 oz) flour
  • 1 teaspoon baking powder
Cream butter and sugar, add essence. Add egg, then sifted dry ingredients. Roll on to greaseproof paper (or baking paper) to about 1/4" thick. Place on a tray and bake 20-30 minutes at 180 C (350F).

For the marshmallow (the fun part:-)

  • 2 dessertspoons gelatin (powdered)
  • 1 cup Cold water
  • 1 cup sugar
  • 1 egg white
  • 1 cup icing sugar
Soften gelatin in cold water, add sugar and boil 8 minutes. Cool. Beat white of egg stiff, fold in sifted icing sugar, then slowly pour in cooled gelatin. Beat in electric mixer until white and thick (about 3 minutes). Spread on to shortcake immediately. Decorate with sprinkles or ice with chocolate icing.

Enjoy!!

Monday, March 12, 2012

Grandma's ice-cream recipe.....

 I thought I'd start this week off by sharing my favourite ice-cream recipe, seem those of you who are living in the northern hemisphere are heading into spring and we here in New Zealand are still trying to hang onto the 'summer that never was' :-) This is the ice-cream that my Mother made on a very regular basis when we were kids and as it is quite easy I used to make it for her sometimes after school while she was working. I call it "Grandma's ice-cream" because the recipe originally came from my Grandmother on my father's side. My Grandparents lived on a farm and sometimes after a visit there, we would come home with some fresh milk straight from the cow before the cream had been taken off. It was this milk that made the best ice-cream. So now when I make it I always substitute 1 cup of milk for 1 cup of cream. Now you may have noticed in the photos that there are pieces of biscuits/cookies in it... One of our favourite ice-cream flavours in our family is "Cookies and cream" so to this basic recipe we added one packet of  "Oreo cookies", crushed. We have also tried the traditional New Zealand flavour of Hokey Pokey which was pretty nice too :-)
Okay onto the recipe:

  • 3 tablespoons sugar
  • 8 heaped tablespoons full-cream milk powder
  • 3 cups milk (substitute 1 cup for cream)
  • 1 1/2 teaspoons gelatin dissolved in 2 tablespoons of hot water
  • 1-2 teaspoons natural vanilla essence
Mix sugar and milk powder together in large bowl. Dissolve gelatin in water in a cup standing in a pot of simmering water stirring until clear. Slowly add milk/cream to sugar and milk powder and whisk until sugar is dissolved. Add vanilla essence then the dissolved gelatin whisking all the time to ensure gelatin is completely dispersed and no lumps have formed. Pour into a lidded plastic or freezer proof container and freeze for one hour or until sides are just starting to freeze. Remove from freezer and pour into ice-cream maker and churn until thick and creamy. Now if you don't have an ice-cream maker you can use an electric mixer to beat until thick and creamy although you may have to repeat this process again to obtain the thick and creamy consistency.
Once the ice-cream is churned or beaten you may then add the crushed biscuits, crushed pieces of Hokey Pokey if desired. Semi-crushed berries such as raspberries or blueberries would also be a nice addition.

One of the benefits of making your own ice-cream I think is that you know what's in it therefore no hidden preservatives or additives. If you've been reading by blog for a wee while now you will know that just before Christmas I purchased a small ice-cream maker. I had resisted buying one for quite a few years as I had successfully made ice-cream without one using my Kenwood mixer but now that I have one I wonder why I waited so long. It was not that expensive and churns up deliciously creamy ice-cream without that not so nice 'icey consistency' that you can get making home-made ice-cream. So if you've hesitated on purchasing an ice-cream maker like I did, hesitate no more! They are worth it. Plus if you live in NZ and collect Flybuy points they have one available in their catalogue too.

Tuesday, February 14, 2012

Valentine biscuits...

Some heart shaped biscuits in honour of Valentine day today. We don't get into the whole commercialisation of  Valentines day in our house but I'm quite happy to do little things like make heart shaped biscuits to celebrate in a small way. The bottom biscuits are Shewsbury biscuits (lemon flavoured and sandwich together with jam) and the top biscuits are chocolate shortbread which as I am typing this up it has occurred to me that they would be nice dipped in chocolate, white or dark. Anyway the Shewsburys are my husbands favourite and the chocolate shortbread are a favourite of both my daughters. They are melt-in-the-mouth shortbread, so delicate that they break quite easily but are very moreish and I thought I'd share the recipe here.

Chocolate Shortbread.
  • 250gms butter, softened
  • 1/2 cup/75gms icing sugar
  • 1 cup flour
  • 1 cup cornflour
  • 1/4 cup cocoa powder
  1. Place butter and icing sugar in a mixing bowl and beat until mixture is creamy. Sift together flour, cornflour and cocoa powder. Stir flour mixture into butter mixture.
  2. Turn dough onto a floured surface and knead lightly until smooth. Roll out until approx. 1/2 cm thick and cut into squares or shapes with cookie cutters. Bake @160C/325F for 20 - 25 minutes or until firm. Allow to cool on trays. 
*Please note if dough is too soft to roll place in fridge for about 15-20 minutes until firmer.

Enjoy and I hope everyone had a wonderfully happy day today!!

Thursday, December 1, 2011

Chocolate and peppermint cream biscuits - the Recipe

This is the third batch that I've made of these biscuits and I think they are near enough to perfect to share the recipe with you all. The biscuit recipe is roughly based on a Donna Hay recipe but I wanted it to have a more intense chocolate taste because my favourite chocolate is the very darkest kind and also because I think dark chocolate goes better with peppermint. Anyhow here is the recipe!

Chocolate biscuit.
You will need:
  • 130 grams butter
  • 1/2 cup icing sugar
  • 3/4 cup plus 2 tablespoons plain flour
  • 5 teaspoons cornflour (cornstarch)
  • 1/4 cup cocoa powder (best quality you can find or afford)
  • 2 egg yolks
Preheat oven to 180 C. (350 F.). Cream butter and icing sugar until light and fluffy then add egg yolks and beat until well combined. Sift dry ingredients and add to butter mixture mixing in to form a firm dough. Rest in the refrigerator for 20 mins. Either roll into small balls and flatten with a fork or use a biscuit press (as I did) using the smaller size. Makes approximately 25 filled biscuits.

Icing:
In a food processor process 1 cup icing sugar, 25 grams butter, 1/4 teaspoon green food colouring and 1/2 teaspoon peppermint flavouring. Add 1- 2 tablespoons cold water to form a spreadable icing.  

Sandwich the biscuits together with icing and enjoy!

Hint: Make sure your oven is set to 'bake' not 'grill' as I did the other day! I had baked a batch of biscuits then switched it to 'grill' to dry roast some peanuts to make some peanut brownies. Unfortunately when I went to bake the peanut brownies I forgot to switch it back to 'bake' resulting in some biscuits being perfectly cooked but burnt on top! Just thought I should keep it real here so you don't think I'm some perfect Martha Stewart type cook :-)

Wednesday, August 31, 2011

A rainbow cake of sorts....

Ever since I saw this cake on pinterest I have wanted to make it and thought it would be the perfect birthday cake for Caitlin this year. Unfortunately on the morning of her birthday I was fast running out of time. Going to bed late the previous night didn't help as I slept in a little :) So inspired again by this cake I made a quicker version of a  rainbow cake. 
 We still had 6 different colours and yes six different bowls to wash. I used a Victorian Sponge recipe and just divided it into 6 to mix in the colours. The girls loved helping me out with this stage of making it and thought it looked a bit like the coloured playdough I used to make for them when they were younger. I was a little concerned the extra mixing would spoil the lightness of the cake but I'm pleaed to say it turned out beautifully.

As you can see it was so nice it was half gone on Sunday afternoon and it is now sadly all gone. The yummy butter icing also added to it's deliciousness! You can find more Rainbow cake inspiration here.


Amelia also helped out by making these yummy chocolate cupcakes with chocolate fudge frosting. She has made quite a few cupcakes recently but these have got to be her best yet. 


Wednesday, July 13, 2011

Sweet treats...


I have a recipe file that is bursting with recipe's ripped or cut out of newspapers and magazines as I come across them but I don't often actually try all of them out. This recipe for the above tarts is one that I've had for far too long and had never made but its always catches my eye when I see the title "Mt Manganui tarts". Mt Manganui is a town just a bit further down the east coast from our town,Whangamata, and why these tarts are named after this town I have no idea. I finally decided to try them out yesterday afternoon, my excuse being that they would make a nice lunchbox treat or afternoon tea treat for the girls. I am happy to say they are delicious! They are made up of a sweet pastry tart bottom filled with orange custard topped with a almond scented topping.  Yum! 

Here's the recipe for you to try:

You will need;
16 ready made sweet tart cases

Custard: 3/4 cup milk
1/2 teaspoon vanilla
1 teaspoon finely grated orange rind
1 egg yolk
2 tablespoons sugar
1 tablespoon flour

Topping:
125 grams butter
1/2 cup sugar
1 egg
1 cup flour
1 teaspoon baking powder
1 teaspoon almond essence
  
To make custard: 
Bring milk to the boil. Remove from heat and stir in vanilla and orange rind. Beat egg yolk and sugar together with flour. Reheat milk and slowly whisk in egg mixture. Continue whisking until the custard is thick. Remove from heat. Cover top with baking paper and refrigerate until cold.
To make topping:
Melt butter in a saucepan. Mix in sugar. Cool and beat in egg. Sift over flour and baking powder. Combine gently with almond essence.

Place pastry cases on an oven tray. Divide custard among tart cases and spread topping mixture over custard.  Bake at 190 degrees for 15 to 20 minutes. Enjoy!

Also you can view all my recipes on my new "Recipe" page tab just below my header. Tutorials tab coming soon!

Friday, April 22, 2011

Easter traditions...

Just popping in to wish everyone a lovely Easter weekend. As is tradition in our house we bake our own Hot Cross Buns on Good Friday. I do love making these buns and they just fill the house with the most delicious yeasty, spicy aroma. Caitlin was my assistant today, helping to roll them into round little buns then piping on the crosses before they went into the oven. Sadly they are now all gone so we just might have to make some more tomorrow....

Monday, April 4, 2011

This weekend.....


......was spent catching up on chores around the home that didn't get done while I was away last week. I finally got on top of the washing which is now nicely ironed and folded and ready to get dirty again ;)  I don't know how some people get away with not ironing, it just wouldn't work for me. There's a quote I found on Pinterest recently which says "A clean house is a sign of a wasted life" and I can certainly agree with that, as there's only so much cleaning you can do before you really need to get out there and live your life. 
However if there are things that obviously need doing like a mountain of laundry then I just can't seem to concentrate fully on the task I really want to be doing, something to do with that whole guilt thing we women are often afflicted with I think because this doesn't stop my husband from doing what he wants to do.

I did however manage to get out into the garden to search for some flowers for picking and arranging. This old milk bottle holder and bottles is a relic from my childhood when at around 5pm everyday the milkman would come around and exchange empty bottles for filled ones. Since acquiring this milk bottle set from my parents I have always thought it would look good filled with a few simple flowers. I think it makes a lovely centre-piece on our outdoor table.  Nice and rustic!  For further inspiration have a look at these arrangements, here, here, and here. And how about this idea when flowers are hard to find.


Filling the tins for the coming week was also on my 'to do' list so yesterday afternoon I made some 'Oaty Chocolate chip biscuits' which is a great recipe because it makes a lot, and I also tried a new Banana bread recipe that I stumbled upon somewhere in blogland. Whilst I do like my usual Banana bread recipe I liked the sound of the combination of peanut butter and bananas in this one. It turned out to be quite yummy and next time I think I might add chocolate chips. I'm sure my girls won't mind me adding chocolate to a recipe :)

Wednesday, February 23, 2011

A sweet summer tart.....

Okay if you're not into cooking and came to look at pretty sewing projects I'm sorry to disappoint but I just had to share the following 2 recipes with those that maybe interested. I love to cook/bake and have far too many recipe books but these following recipes are two that I use a lot.
I love it when I can make a meal with 90 % of the ingredients coming from my little vegetable garden. It gives me such a good satisfying feeling feeding my family good organic food that has cost very little.

This tart is perfect for this time of the year when tomatoes are ripening up faster than you can use them,

...capsicums are waiting to be picked because they are weighing down the plant.

Red onions strung together by my clever Mum and bigger than both my hands put together...not kidding, one feeds us over 4 meals!

Okay here's my Summer tart ready to go in the oven and here's the recipe;

2 sheets of pre-rolled flaky pastry (sometimes I make my own if I have time)
2 tbsp tomato paste, small handful of fresh marjoram, 1/2 tsp salt, black pepper
1 tblsp basil pesto, 1 tblsp water.
250gms tomatoes, 1/2 a medium capsicum, 1 small red onion or half a large one, 1 medium courgette, 1-2 cloves garlic, crushed, 8 basil leaves, roughly shredded, 2 tblsp olive oil, 100gms feta cheese, crumbled. Salt & pepper to taste.

Pre heat oven to 200C. Lay pastry on lined or greased baking sheet joining together to make a rectangle. Without cutting right through, run a knife around pastry about  2cm inside the edge marking out a smaller rectangle. Mix together the next 6 ingredients and spread over the inner rectangle. Place the following in large bowl; quartered tomatoes, roughly sliced onions and capsicum, courgettes sliced lengthwise, oil, garlic and basil. Toss together so everything is coated in the oil then spread onto the prepared pastry. Sprinkle evenly with the crumbled feta and season with salt and pepper. Bake until the crust is golden brown and the veggies begin to brown at the edges.

Serve hot or warm with a green salad. This recipe really is simple to prepare and the best bit is my girls devour it!

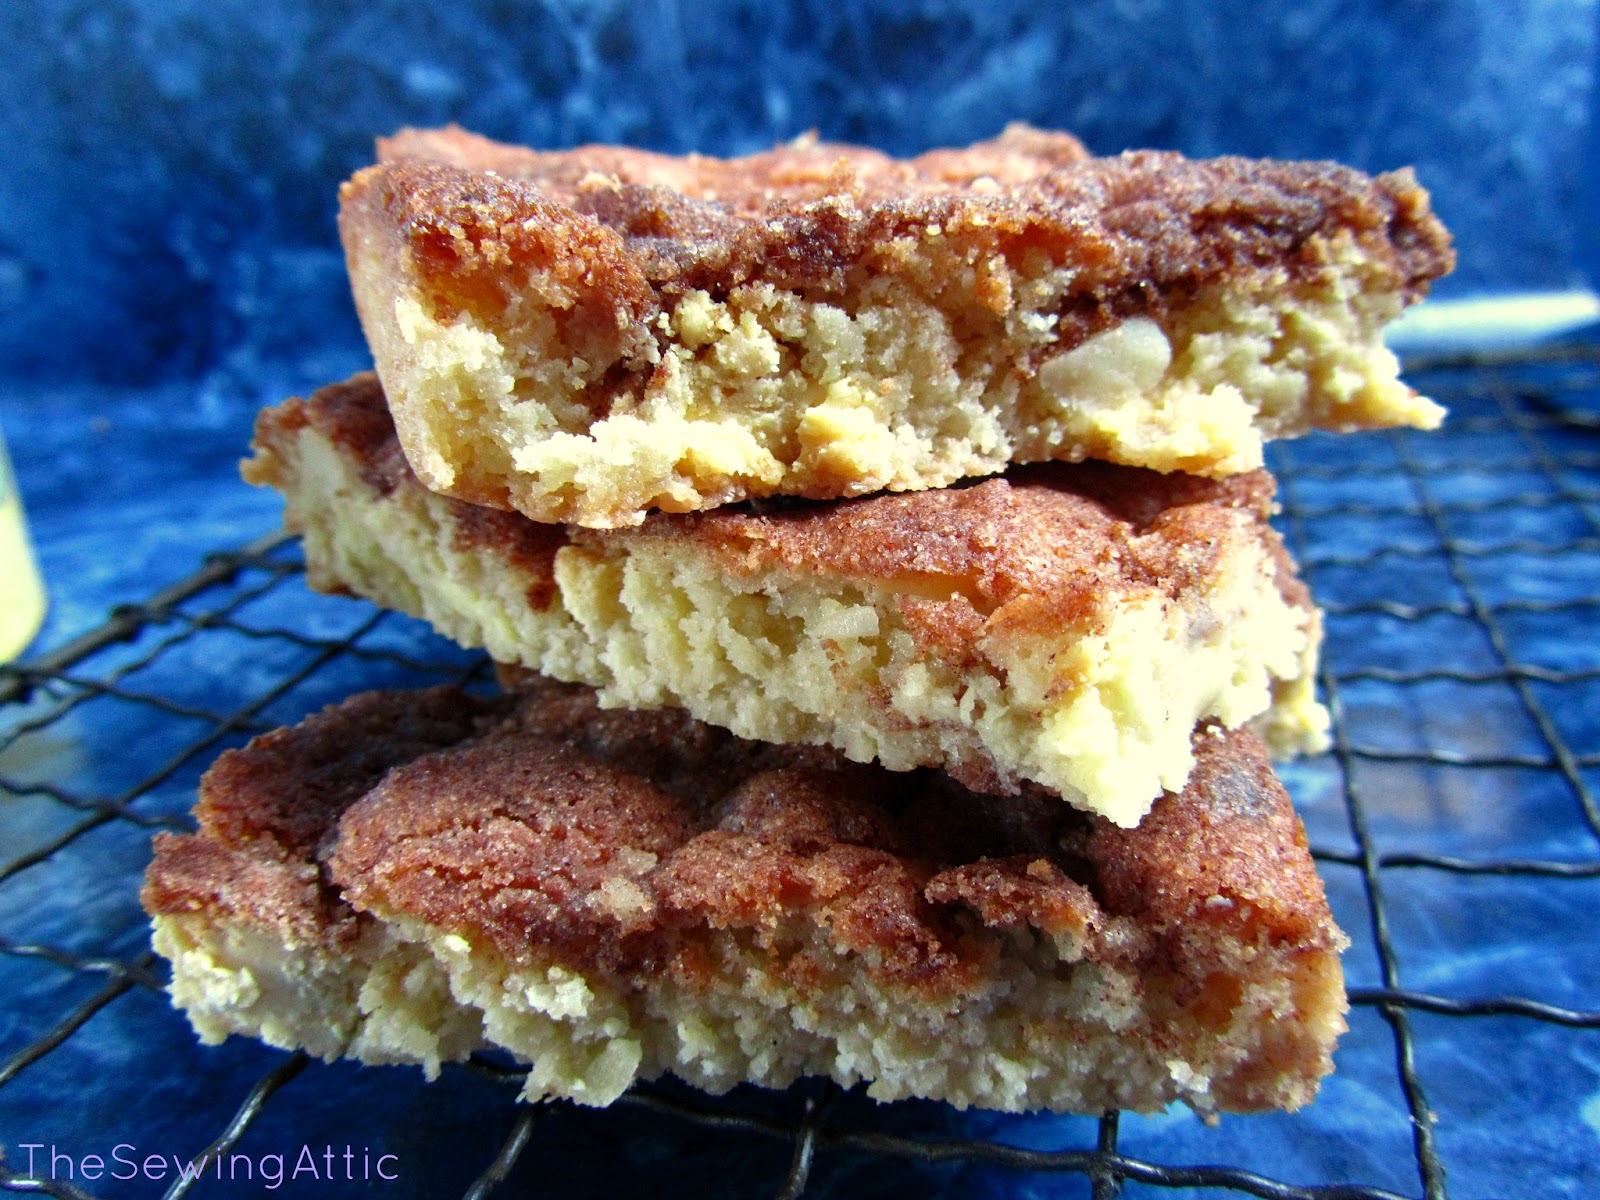
Okay so this following recipe is another favourite of mine because  it uses up those over ripe bananas that no-one wants to touch ( and don't they ripen far too quickly at this time of the year) plus I always like to make the most of having the oven on so this "Banana bread" went into the oven last night when the tart was done.  It is a 'Donna Hay' recipe that I have changed a little to make it a nice dark loaf.
You will need;
125gms butter, 1 cup dark brown soft sugar,1 tsp vanilla extract, 2 eggs, 2 bananas, mashed, 1 1/2 cups plain flour,sifted together with 1 tsp baking powder, 1/2 tsp baking soda and 1 tsp cinnamon, 1 cup sultanas, 1/4 cup treacle, slightly  warmed.

Preheat oven to 160C. Cream butter, sugar and vanilla till pale and creamy. Gradually add eggs beating well after each addition. Add banana, sifted dry ingredients and treacle, mix to combine. Spoon mixture into a lined loaf tin and bake for 1 1/4 to 1 1/2 hours or until skewer comes out clean. Cool in tin.

This is great for school lunches or afternoon tea and for those of you who don't like traditional banana cake like myself believe me you will like this. I make this loaf once a week at the moment and we never tire of it.

Also just wanted to say that my thoughts are with everyone down in Christchurch that is reeling from the devastating earthquake that happened yesterday afternoon. We have been glued to the TV watching it unfold. It is just not fair that they are going through this again...

Monday, April 26, 2010

Autumn pickings......

We have been enjoying some beautiful clear autumn days for weeks now and this last weekend was no exception. On Sunday I took the girls out to the orchard which is a 10 to 15 minute drive north of  Whangamata to pick some autumn fruits. Even though they had a little moan about it they had a lot of fun climbing the ladder provided and picking the biggest and then the smallest apples they could find.

The trees were laden and the fallen apples left a lovely autumn coloured carpet underneath.

We picked braeburns for eating and......

......grannysmiths for cooking although these are Amelia's favourite eating apples.

An abandoned birds nest from last spring.

After picking 2 big bag fulls of apples we headed on over to the Feijoa trees. These are our favourite autumn fruits and our orchard has some really big juicy ones. When we tire from eating them I make Feijoa muffins and Feijoa cake.

We also filled the biscuit tins. The girls baked something each and even managed to bake in the kitchen at the same time without fighting. Amelia helped Caitlin out when she needed it but didn't interfere when she was wanting to be independent and do things herself. I was very impressed with their maturity and managed to put a dent in my ironing pile while they were busy. Caitlin made Anzac biscuits  (this is a great, easy recipe perfect for beginner cooks!) because Sunday was also Anzac day and Amelia made a lemon and almond slice. I made the double chocolate biscuits in the foreground of the above photo.

Related Posts Plugin for WordPress, Blogger...